Question sets
How to create a question set and what settings to consider
- From the Author tab, select 'Question Sets'.
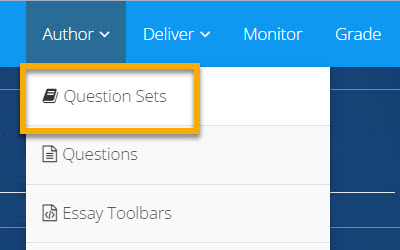
Selecting 'Question Sets' from the Author tab
- Click the 'Create New' button in the top-right of the screen, to create a new question set.
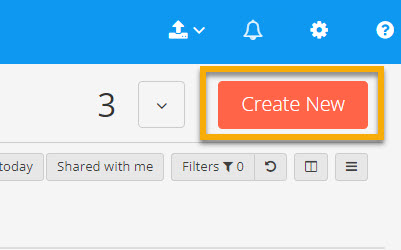
The 'Create New' button
- Name your new question set in the format: [Paper Code] [Paper Name] (YYYY/YY). This step is essential.
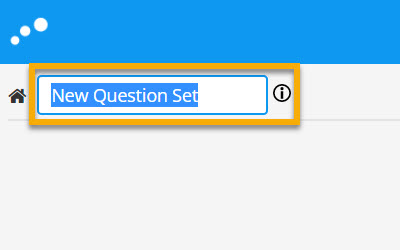
Naming a New Question Set
Can't see the Author tab?
You need to be assigned the 'Author' role to access this tab. This role should be assigned by department administrators with access to the Manage Inspera Roles task in eVision.
To add a question to your question set, you can either:
- Create a new question, OR
- Add an existing question from the question bank
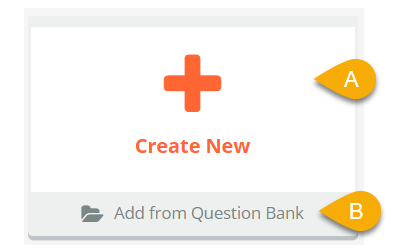
Selecting 'Create New' or 'Add from Question Bank'
- Click 'Create New' and you will be shown the available question types. Inspera supports both questions marked automatically and questions marked manually. The question types currently used most often at Oxford are Essay, Upload Assignment and Multiple Choice.
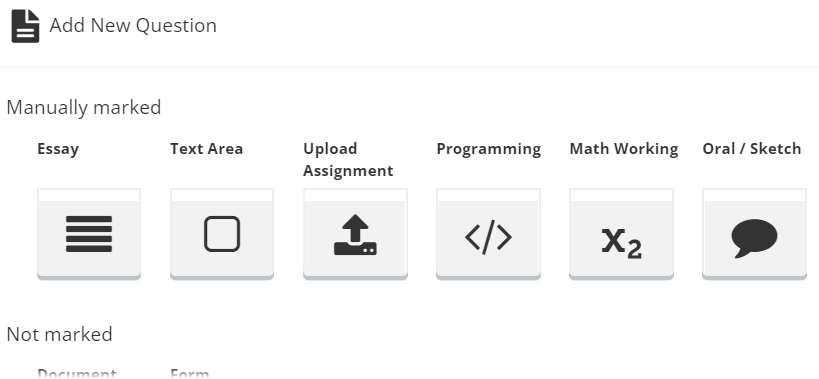
Examples of different question types
- Select the type of question you want to create.
- Name and edit your question.
- Click 'save' and then 'close', to return to your question set. Alternatively, tick 'add same type' and click the plus icon. This will add another question of the same type, and can be a useful shortcut.
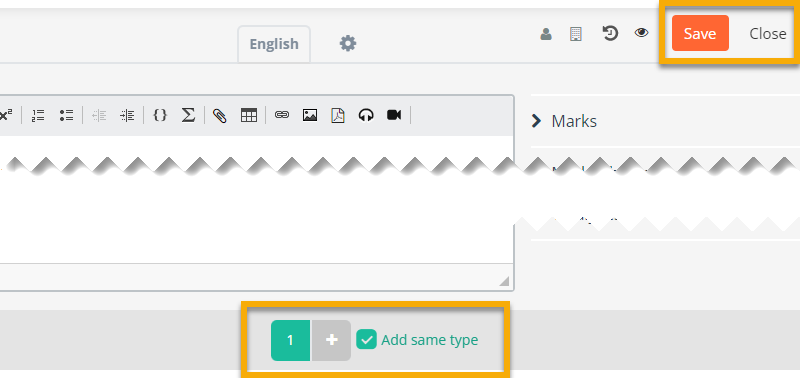
Adding another question of the same type
Naming a new question
Your question bank will grow quickly, as more submissions and exams take place in Inspera. So it is important to name your questions in a meaningful and consistent way. This will allow them to be identified easily at a later date.
A suggested format is [Paper Code] [YYYY/YY] Q[Number]. E.g. A11111W1 2022/23 Q1.
Once you are more familiar with Inspera, you may want to apply labels to questions. See the guide in the Inspera Help Centre (external link) to explore this further.
- Click 'Add from question bank' and you will be shown all the questions you have access to.
- Tick the relevant question or questions. Then click 'Add' to add them to your question set.
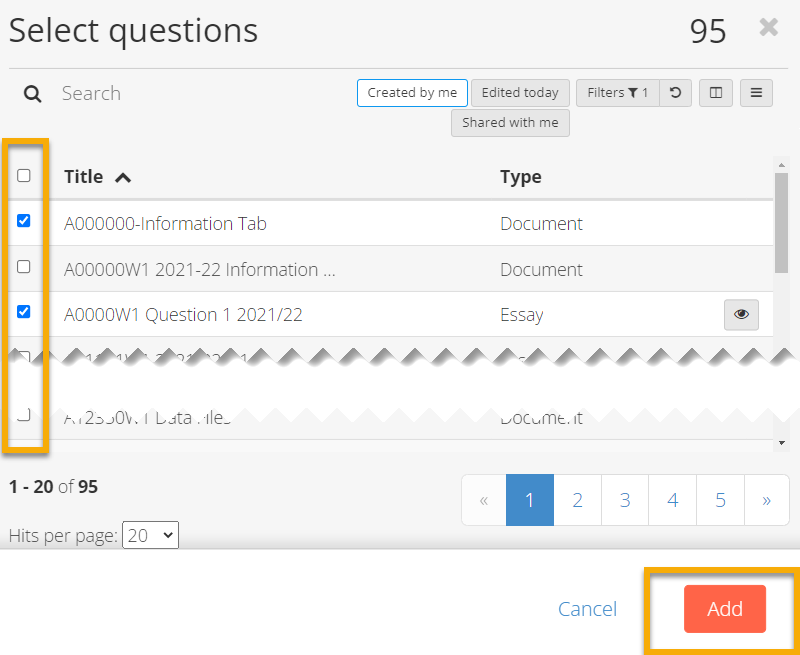
Selecting questions
Finding a Question
You can use the search bar and filters to find a question in your question bank. You can also use the saved views to left of the question bank (these are listed under 'default views', 'my views', and 'shared views'). For help creating a saved view, visit the Columns and saved views page.
Important note
When you add an existing question, you add the ‘master’ version of that question, not a copy. Any edits you make to the question, within the question set, will be made to the master.
If the question is already in use in another question set, a user who opens that question set will be notified that the question has been modified and prompted to accept the updates.
For guidance on how to copy a question, see the next tab ('Move, delete or duplicate a question').
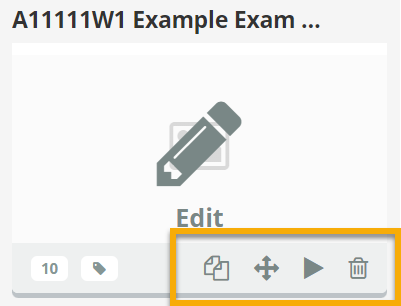
Options for editing the question
Under each question in your question set, you will see the option to:
Remove the question from the question set. This will not delete it from the question bank.
Drag and drop the question to a new position in the question set.
Duplicate a question within your question set.
Duplicating (copying) questions or question sets
You can also duplicate a question within the 'Questions' area of the Author tab.
Click on the row containing the relevant question (anywhere but the title), or hover over the row and select ‘More’. The duplicate icon will be shown as one of the available actions. You can also duplicate whole question sets in this way (from the Author tab, select 'Question Sets' instead of 'Questions').
When a question or a question set is duplicated, all parts of that item are copied and it is independent of the original. Changes applied to the duplicate will not affect the original. The duplicate will not be shared automatically but is private to you.
The name of a duplicated question set will be prefixed with "Copy of..." by default. This also applies to questions, whether copied as part of a question set or on their own. Don't forget to update these names as soon as possible to avoid confusion.
When you edit a question, you should be aware that...
- The question text can be typed, or copied and pasted, above the response box. You can use the toolbar to format the question text, as well as to add images, tables, mathematical equations, web links, files (all types), videos and recordings.
- When you create a question, you will see a panel of options to the right of the editor.
- This includes the option to edit the maximum marks available for that question. This field will need to be accurate if: you are displaying these marks to candidates (this setting can be turned on in the design tab), or (less common for 2022) your examiners are entering marks directly into Inspera.
- As well as reviewing these options, make sure that you click on the response box, to reveal further settings associated with that area.
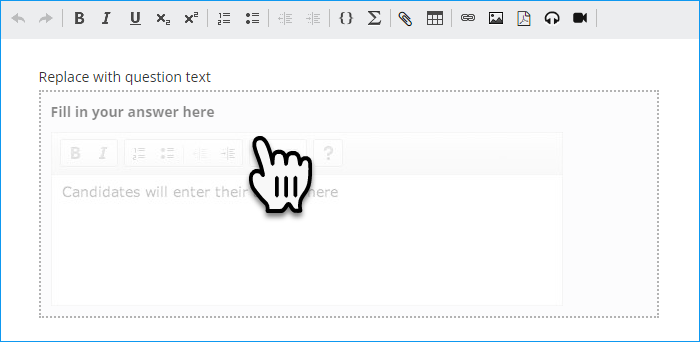
Click on the response box to see additional settings
- One option will be to edit (or delete) the bold prompt displayed above the response box. In the image above (an Essay question), the default prompt is 'Fill in your answer here'. Consider whether you need a prompt at all. It may detract from the question text. On the other hand, a prompt can make it easier for a candidate with a visual impairment to use a screenreader.
- Consider how easy it is to read and comprehend the question on the screen. Breaking a question into shorter paragraphs, and adding 'white space', can improve accessibility.
- If you retain a prompt above your response box, we recommend leaving a blank line between the end of the question text and the response box. If you do not use a prompt, we recommend that you do not leave a blank line between the end of the question text and the response box.
Additional considerations, by question type
File types
You will need to specify which file type(s) students can upload. By default, all file types are allowed.
Please consider that:
- While Inspera will hide the name of any file a candidate uploads, it will only strip underlying metadata from PDF files. The University of Oxford commissioned the development of this functionality ahead of the Trinity Term 2022 exams, and at present we have not requested that it is expanded to cover other file types.
- Only one file can be uploaded per question. A student who takes multiple separate photos of their handwritten work, and attempts to upload them to the upload box, will be unable to.
- The student guidance does not refer to file types other than PDFs.
- PDFs will display within the Grade workspaces. Other files types may need to be downloaded before they can be viewed by the marker.
- Click on the upload response box to reveal the associated settings.
- Under 'File types', untick 'Allow all file types'.
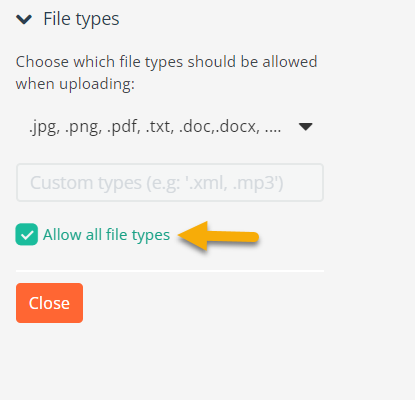
Selecting file types
- This will allow you to deselect, from the drop-down menu, the file types you do not want to allow.
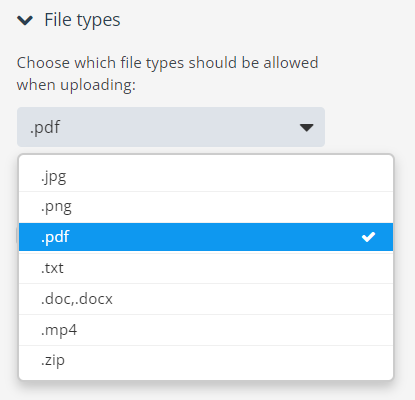
Selecting file types
Prompt
You do not need to state in the prompt the file type(s) the candidate can upload. This information will be displayed automatically underneath your prompt, along with the maximum file size allowed.
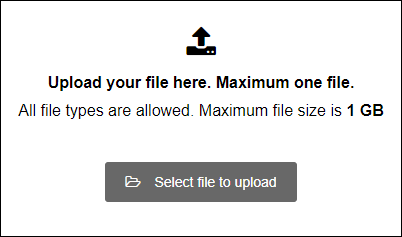
Example of a file upload box
File uploads
In addition to typing an answer in the text box, you can allow candidates to upload a file to an Essay question.
Before using this option, please be aware that a Turnitin similarity report will not be generated for a file uploaded in this way. This is therefore a good option where a supplementary drawing or diagram is required. However, if you want candidates to upload a text-based file, it would be better to create a separate Upload Assignment question. See the Turnitin Integration with Inspera guide for more information.
As with an Upload Assignment question, you will need to specify which file type(s) the candidates can upload.
Limit maximum words
This setting will prevent students from typing after a word limit has been reached. Before you use this setting, consider how a candidate is using the text box. If they are typing an essay, they may want to draft a longer response before refining it to be within the word limit.
If you apply a word limit to the response box, please actively highlight this to your students when preparing them for the exam.
Show word count
This setting is ticked by default. It will show the candidate how many words they have entered into the text box.
Size
You can adjust the size of the text box, as it first appears to candidates. Once they start typing, the text box will expand automatically (unless you deselect this setting, which is not recommended).
Text toolbar
You can simplify the toolbar displayed to students within the text box. It is also possible to add a bespoke toolbar. Please speak to the Digital Exams Team (digitalexams@admin.ox.ac.uk) if this is something you want to explore.
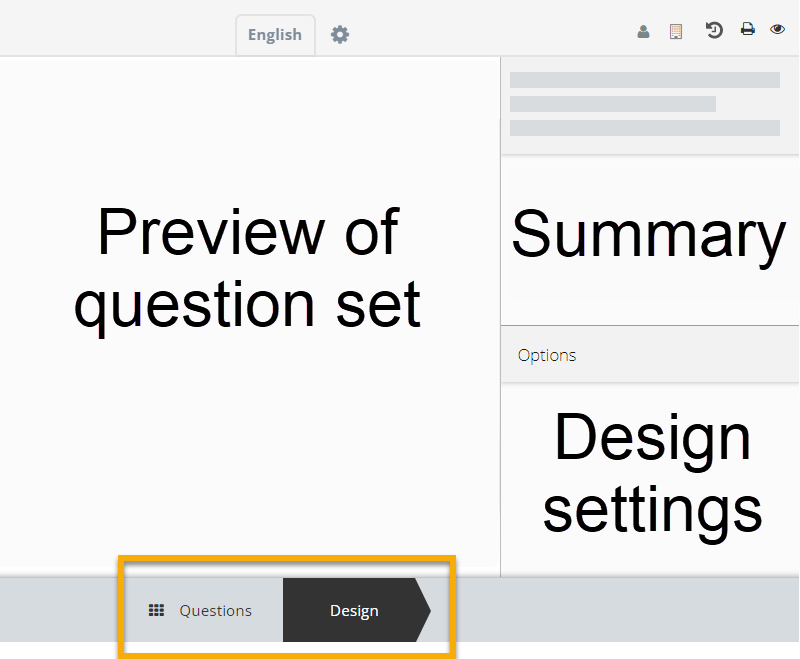
Selecting the 'Design' tab
In the table below, we have highlighted in bold the actions we suggest you take in relation to the design settings. However, please do explore the available options by turning settings on and off, and observing the effect on the preview.
| Setting | Suggested action | Note |
|---|---|---|
| Numbering scheme | Use any as required | To use the 'Section alphanumeric' and 'Section numeric' numbering schemes, organise your questions into sections. |
| Hide navigation bar | Leave unticked | |
| Disable navigate back button | Leave unticked | |
| Table of contents | Use as required | |
| Hide question titles | Tick | Only display the question title if it is necessary and of relevance to the students. |
| Show sections in table of contents | Untick |
Untick this setting if you are not organising your questions into sections, or you don't want students to see the section names. It results in a section header appearing on the submission page, above the list of questions. |
| Enable flagging | Tick | This can be a useful tool for students. Where questions are presented in a vertical layout, you may prefer to leave this off as it can make the screen appear cluttered. For Medical Sciences, please refer to local guidance on this. |
| Allow candidates to highlight section text | Leave unticked |
|
| Question maximum marks | Use as required | This will show candidates how many marks are available for each question. |
| Show interaction accessibility guide | Leave ticked | |
| Show progress indicator | Leave unticked | |
| Show warning when navigating away from pages with incomplete responses | Leave unticked | |
| Highlight next button when responses are completed | Leave unticked |
You can organise the questions in your question set into sections. You do not have to show these sections, or the names of the sections, to students if this is not relevant to them.
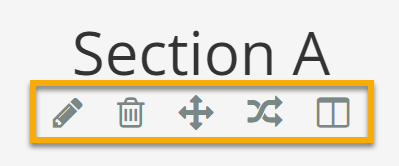
Section settings
Under each section in your question set (all question sets have at least one), you will see the option to:
Edit the name of the section
Delete the section. Questions within it will not be deleted from the question bank
Drag and drop the section to a new position in the question set
Randomise questions within the section, or pull a set number of questions from a larger pool
Change the section layout
Consider the section layout, when creating a question set
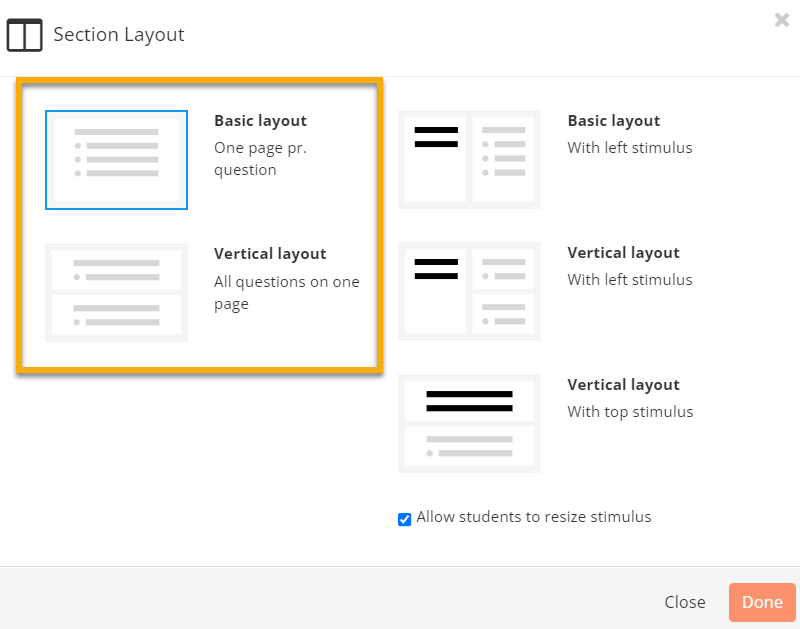
Section layout
By default, your question set will display one question per page. However, displaying multiple questions on a page may be appropriate for your exam.
With a vertical layout, candidates will be able to scroll down through the questions, while retaining the ability to jump between them using the navigation bar.
Remember that, if you create more than one section, each can have a different layout.
Example of an exam using the vertical layout
An exam is made up of three questions. Question 1 has four parts, with a response box required for each.
The author of this question set has decided to use the alpha-numeric numbering scheme (found in the design tab), so that students are shown the questions as: 1a, 1b, 1c, 1d, 2 and 3. The author has structured the exam into sections. All parts of question 1 are in one section (1a, 1b, 1c, 1d), question 2 is in another section, and question 3 in another.
The vertical layout is applied to the first section of the question set, allowing the students to scroll through and answer all parts of question 1, before moving onto question 2 and 3 which are each on a separate page of the test.
Left and top stimulus
The 'Section Layout' settings are also where you can add a stimulus to display alongside the questions in that section.
The stimulus can be located on the left or top of the page. However, a top stimulus is less common and should only be used with 3-5 lines of text, to avoid interfering with the candidate's view of the question.
An example of a stimulus panel can be found in questions 7 and 8 of the demo test here: DEMO TEST
The best way to provide candidates with general instruction - particularly at the start of their exam - is by using an information tab. In the navigation bar, this tab is denoted by an icon and does not disrupt the numbering of your exam questions.

Example of an information tab
How to add an information tab
Add an information tab to your question set in the same way you add questions. When you create a new question, look for the question type 'Document'.
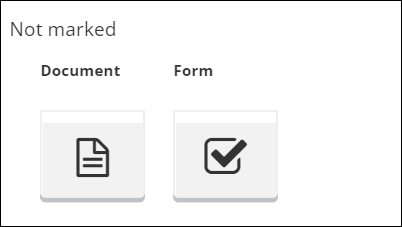
Example of the 'Document' question type
What information should I include on the information tab?
Where it is applicable, you should include the following information:
- The number of questions the student is expected to answer, from which sections, etc.
- A comment on the marks available, or the weighting of different questions.
- Instructions relating to referencing or bibliographies.
- Word limit for each question. Please note, it is no longer necessary for students to include a word count at the bottom of responses they type directly into Inspera. This information will now be presented automatically to the marker.
For an online exam:
All question sets should include information on how to contact the Online Exams Support Desk. For example:
Need help? If you encounter a technical problem, contact the Online Exams Support Desk, by completing the form at: www.ox.ac.uk/online-exams-help. Urgent issues will be prioritised. If you cannot complete the form (for example, because you do not have an internet connection), you can call (01865) 612121.
For an online exam with uploaded element(s):
- Please state how much of the exam duration students should set aside to scan handwritten work / convert responses to a PDF and upload them to Inspera. For example:
“Please remember that, within the time you have to complete this exam, you have been given [XXX] minutes of additional technical time to scan and upload documents. You must reserve enough time to do this.”
For an online exam with ‘typed only’ responses:
- Please emphasise that students should type directly into Inspera and that work not entered into Inspera by the end of the exam duration will not be marked. For example:
“You should type your answers directly into Inspera, where they will be regularly saved and you can continue working if you lose your internet connection. Typing outside of Inspera is done entirely at your own risk. Any text not entered into Inspera at the end of the exam duration will not be marked.”
There are three ways to incorporate a PDF into your question set.
- Display the PDF alongside an individual question. Students will be able to adjust the width and height of the PDF window, and zoom in and out of the PDF. When editing a question, look for the 'PDF panel' option to the right of the question editor. An example of how a PDF panel looks to the student can be found in question 6 of the demo test here: DEMO TEST
- Display a link to the PDF within the information tab at the start of the test, using the 'insert file' option. When a student clicks the link, the PDF will open in a new window. This is NOT the same as uploading the PDF in a location outside of Inspera and linking to it. This is not necessary. Look for the paperclip icon in the toolbar of the question editor.*
- Attach the PDF as a 'resource'. A resource is available throughout the test, in a footer at the bottom of the screen. To add a resource, click on 'Show resources' in the bottom right of the question set editor. Note that this will add extra space to the bottom of the screen and is therefore less preferable for In-Person Typed exams where screen space is more limited.
*Option 2 can be used for file types other than a PDF (an Excel file, a template Word file, etc.). Option 2 cannot be used for In-Person Typed exams because the Locked Down Browser on the Chromebooks will prevent any external links from opening. For In-Person Typed it is preferable to use a PDF panel or Stimulus panel.
When considering which option to use...
Think primarily about how candidates will use the PDF and how easy it is for them to find it. The examples below illustrate this point.
Exam A (Online Open Book)
Candidates are provided with a PDF, containing all their exam questions and related diagrams. They spend their exam writing their answers by hand, on paper. At the end of the exam, they scan their responses and upload them to the test.
In this example, Option 2 would be preferable, because the priority is to allow candidates to view the PDF in a full screen, as simply as possible. They don't need to engage with any other aspect of the test, until the very end when their answers are ready to upload.
The author of this question set should consider stating, above the upload box, that candidates can find the link to the PDF containing their exam questions in the information tab.
Exam B (Online Open Book or In-Person Typed)
Candidates are required to read a two-page excerpt, and then answer a series of questions in relation to it.
In this example, Option 1 would be preferable, as the candidates will want to refer to the excerpt while typing their response (and referring to the questions) within Inspera. They don't want to jump between browser windows.
Depending on the format of the excerpt, the author of this question set might consider transferring the information in the PDF to a stimulus panel.
Exam C (Online Open Book)
Question 3 of an exam requires candidates to download an Excel file, a data file and a PDF. They need to cross-reference between all three files to find a solution to the problem they have been given.
In this example, Option 2 would be preferable, as all three files can be attached in the same place (for example, in a bulleted list within the question text or in the information tab).
The author of this question set could consider combining all these files into a single zip file, and attaching the zip file to the question or within the information tab.
An example of a stimulus panel can be found in questions 7 and 8 of the demo test here: DEMO TEST
A stimulus panel is added to a 'Section' of a question set, rather than to individual questions, as you would for a PDF panel. So you can choose whether a stimulus panel is displayed alongside one question or multiple questions.
As is the case in the demo test above, you do not need to show students that you are using sections to structure your question set.
See the 'Design options' tab on this webpage for how to add a stimulus panel (under 'Section Layout').
The following is relevant only for Online Open Book Exams.
If a webpage or external link is relevant to the whole exam, you can add it to your question set in the information tab or individual question tab as a URL. Do so by clicking on the paperclip icon in the toolbar along the top of the text box.

A paper clip symbol highlighted by red circle
When adding a URL directly to an information tab or question, please ensure any active URLs open in a new browser window (use the eye icon to preview the question to check this is working). If the link doesn't open in a new browser window, right-click on the link and click 'Edit Link'. Under the second tab ('Target'), set the Target to 'New Window (_blank)'.
You can find an example of a URL linked within an individual question on question 3 of the demo test here: DEMO TEST
Alternatively, you could include the URL in a PDF which is added as a resource. Resources are shown in the footer of the test window, throughout the exam.
To add a resource, click on 'Show resources' in the bottom right of the question set editor.
When you create a question set, it is private to you (and a small number of users with extended access). To share a question set, use the options in the top-right of the question set.
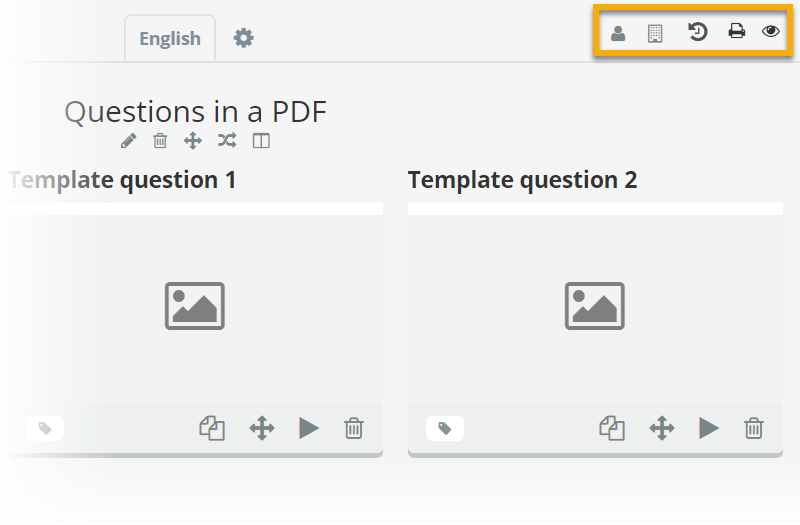
How to share a question set
The person icon
Use this to share your question set with an individual user. If you can't see a user, check with your department administrator that they have been assigned the 'author' role in relation to at least one assessment (this gives them access to the Author tab).
The building icon
Use this to share your question set with an organisation unit. An organisation unit is a group of users. The Exams Schools can set up an organisation unit, to facilitate the sharing of question sets within Inspera.
The eye icon
Before you share a question set, preview and check how it will appear to a student. This is an essential step for centrally-run exams.
WHO DOES WHAT FOR DIGITAL EXAMS?
Inspera Self-Help Flows.
The self-help flows walk you through the processes you wish to complete in Inspera step by step, and are a great tool to use if you're new to Inspera, or coming back to it after a break. Please note: for the flows to work you must already be logged into Inspera before you click on the links below.
Adding an existing question to a question set
Creating a new question (outside of a question set)
Creating a non-marked question (document or form) from within an existing question set.
Adding a resource to a question set
Adding a PDF resource to a question set
Specify accepted files types for a question (outside of a question set)
Need further help?
Contact us
Student Assessments
Education Services
Examination Schools
75 – 81 High Street
Oxford
OX1 4BG
For all exam related queries please email: exams@admin.ox.ac.uk


